Angkot Simulator Best Mods Tier List
Rank mod types for Rupiah earning versus pure flex after the Big City Update.
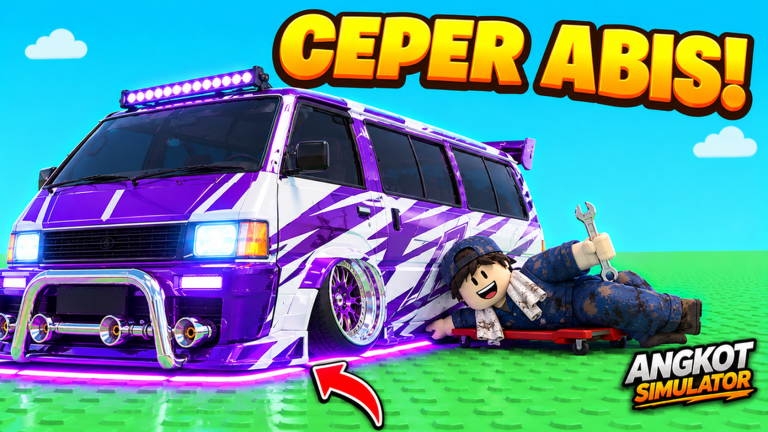
Not every part in the 70+ Angkot Simulator catalogue deserves your next payday. This tier list ranks mod types—suspension, bodykits, rims, liveries, LED packages, party interiors, and related flex—on two axes: how much they help earning (tips, control, readable stops) versus how hard they flex in screenshots and convoys. Use it with the install workflow on Garage & Mods and the funding plan on Earn Rupiah. Individual shop rows rotate with patches; the category logic stays stable.
Ranking criteria
- S: Buy early for almost every earner build, or auto-include on Slot 2 flex.
- A: Strong value once basics exist; situational must-haves.
- B: Good flavour; buy when buffer is healthy.
- C: Optional spice; easy to overspend.
- D: Fun traps that hurt cameras, tips, or wallets.
- F: Skip until everything else you care about is owned.
Earning weight matters more on Slot 1; flex weight matters on Slot 2. Slot 3 can break rules for experiments. If you are still onboarding, finish Getting Started before hunting S-tiers.
S tier — buy with purpose
Suspension (earning): S-tier for money. Stable ride height and calmer body motion make granny tips realistic on stadium exits and Puncak descents. A slightly practical suspension setup beats a slammed flex stance that scrapes and upsets braking. Put a sane suspension choice on Slot 1 before loud kits.
Functional lighting / restrained LED (earning + night flex): S-tier when it helps you see curb markers at dusk without washing out the minimap. Harbour night loops and train-station peaks reward readable lights. Full rainbow spam can still be Slot 2 S-tier for flex, but earner builds prefer cleaner beams.
Clean, readable liveries (earning): S-tier for sanity on long grinds. You will stare at Slot 1 for hours—pick paint you will not hate. Corporate Sudirman or simple campus colours often age better than meme wraps during weekly pushes.
A tier — high value next purchases
Moderate bodykits (flex-leaning A, earning B+): A-tier presence without wrecking camera angles. Choose kits that keep the curb visible. Extreme widebody that hides passengers belongs lower when money is the goal.
Windshield name (flex A, identity A): Cheap identity win for convoys farming +10% friend fares. Short names rank higher than essays across the glass.
Quality rims with sane fitment (flex A): A-tier style when sizes do not fight steering feel. Giant deep dishes that upset handling drop toward C for Slot 1.
Select performance-leaning engine or response bits (earning A): If the catalogue offers parts that make throttle smoother rather than wheelie-prone, they earn A for tip consistency. Anything that encourages launch abuse falls lower for granny-tip players—see Controls.
B tier — solid when funded
Themed district liveries (flex B / motivation A): Beach bright wraps, industry grit, stadium pride—great for Slot 2 or 3 and for morale. Not mandatory for fares.
Extra LED underglow packs (flex B): Fun on harbour and beach screenshots. Keep them off Slot 1 if they distract or hurt mobile frames.
Light interior tidy-ups (flex B): Cabin bits that look good in parked shots without blocking first-person views.
C tier — optional spice
Aggressive stance combos (flex C, earning D risk): Looks fierce, scrapes often, complicates gentle braking. Save for Slot 3 experiments on flat Sudirman loops only.
Busy party interior sets (flex C): Excellent for lobby flex, risky while driving dense station traffic. Equip for photos, swap back before Best Routes grind sessions.
Duplicate cosmetic variants: C-tier collection completion. Buy after buffer rules on Earn Rupiah are green.
D tier — fun traps
Cabin props that block cameras: D for earning. If you cannot see the next junction, fares die.
Ultra-slammed suspension meant only for screenshots: D on any money loop, especially Puncak and crowded stadium approaches.
Matching every LED channel at once on low-end mobile: D for performance; stuttering costs boards and tips.
F tier — skip for now
Any mod you buy only because a random server stranger flexed it, without checking camera, tip impact, or buffer. Impulse full-catalogue clears that zero your Rupiah before weeklies reset. Overwriting Slot 1 with an unfinished meme build. These are F-tier decisions more than F-tier parts—discipline is a mod too.
Earning versus flex quick board
| Category | Earning tier | Flex tier |
|---|---|---|
| Practical suspension | S | B |
| Restrained functional lights | S | A |
| Clean grind livery | S | B |
| Windshield name | B | A |
| Moderate bodykit | B | A |
| Sane rims | B | A |
| Underglow spam | C | S |
| Party interior | D–C | S |
| Extreme slam stance | D–F | A |
Use the board when you are one purchase away from payday regret.
Suggested buy order (Slot 1 earner)
- Practical suspension.
- Readable lighting.
- Clean livery.
- Windshield name.
- Moderate kit + sane rims.
- Only then peek at Slot 2 LED and party flex.
Fund each step with loops, tips, missions, and codes—Codes plus Earn Rupiah. Navigate districts with Routes & Map so test drives actually finish.
Slot 2 flex recipe
When the buffer is healthy: louder bodykit, show rims, LED package, party interior, matching windshield name, beach or harbour livery. Drive flex builds on scenic loops, not during driver-level emergencies. Swap to Slot 1 the moment a weekly needs reliable tips.
Patch awareness
Catalogues grow after content drops. Re-rank new shiny objects with the same criteria—control, readability, tip safety, then flex. Skim Big City Update whenever garage stock changes so you do not miss a new S-tier suspension while buying duplicate underglow.
Common tier list misreads
Players sometimes treat flex S as earning S. Party interiors do not raise fares. Others ignore mobile limits and call LED packs universal S. Another misread is staying on D-tier slam stance because a creator’s thumbnail looked cool—thumbnails are not granny tips. Re-validate after every install with a short tip-focused loop.
Tie-ins across the wiki
Install steps: Garage & Mods. Money: Earn Rupiah. Hands: Controls. Route tests: Routes & Map and Best Routes. Onboarding cash: Getting Started. Free top-ups: Codes. This mods list is the shopping filter; those pages are the rest of the machine.
Final verdict
If you only remember one line: suspension and readable lights pay the bills; party LEDs pay the ego. Build Slot 1 like a professional angkot driver, Slot 2 like a nightlife cover shoot, and Slot 3 like a sketchbook. Follow that split and the 70+ catalogue stops feeling like a trap and starts feeling like a toolbox—exactly how rich fleets stay rich on the Big City map while still looking ridiculous parked under stadium floodlights when the grinding is done.
Re-evaluate after each major payday
Every time you clear a weekly or hit a driver level milestone, revisit this tier list before opening the shop. Ask whether the next part improves tip reliability, night readability, or only screenshots. If the answer is screenshots, confirm Slot 2 is selected. That single habit prevents most F-tier wallet wipes and keeps your earner angkot ready for whatever route the Best Routes meta favours next week.
Frequently Asked Questions
Quick answers to the most common questions.
What is the best first mod type to buy?
Practical suspension for control and granny tips, then readable lighting for night stops on your earner save.
Are party interiors worth it?
Yes for Slot 2 flex and screenshots. Keep them off serious money loops if they distract or block cameras.
Do LEDs increase fares?
Not directly. Clean lighting can help you see markers; spam LEDs are mostly flex and possible performance cost.
Where do I manage style saves?
In the garage—three saves total. Follow the Garage & Mods guide for Slot 1 earner versus Slot 2 flex setups.
Will this tier list change after updates?
Category logic stays; new items get sorted with the same earning versus flex criteria after each patch.